Difference between revisions of "Act 1"
(→Everyone Dies in The White Room) |
(→Captive Audience) |
||
| Line 235: | Line 235: | ||
== Captive Audience == | == Captive Audience == | ||
| + | |||
| + | The heroes wake up back in the room with the magical tapestries. They are fully healed, and any injuries they have suffered are gone. They are all tied to chairs. [[Harlan Underford]] notes that whoever restrained them did not have much experience in tying people up, and tried to make up for it by using excessive amount of rope. When he looks around the room he sees a scrawny, teenage boy attending to [[Zorry Feathermoon]]. He appears to be tenderly adjusting her bindings so that they not any more uncomfortable that they need to be. | ||
| + | |||
| + | When the boy realizes the heroes are starting to wake up, he immediately shifts into the [[Count Drakenhoff]] form. When Harlan calls him out on it, the boy becomes flustered and returns to his youthful appearance realizing there is no point in keeping up the charade. The heroes aggressively demand to be released, making the boy increasingly more nervous. This prompts a hulking giant in full plate armor to enter the room, but the boy sends him away. | ||
| + | |||
| + | The boy demands to know how they have found his secret mansion. Harlan reveals that they have been sent by an affluent scholar and archeologist researching the history of the the Aiden Family. He decides to conceal the fact their employer is also a powerful wizard. The boy is skeptical of that story and keeps questioning them about man named [[Senjack]] who has recently vanished. This man was the only person in Fairhaven who knew how to find the mansion and bypass the protective magic that conceals it. The boy suspects that the heroes are vampire hunters who have captured, and possibly killed Senjack for this information, and arrived here in order to kill him. | ||
| + | |||
| + | Even if they are hired mercenaries, as they claim, they cannot be released now that hey know his secret. They could easily sell the information to actual hunters, or worse yet, publicly expose him making him a target for any and all adventurers. | ||
| + | |||
| + | Harlan realizes that the boy might actually be a good person despite his vampirism, and that the idea of holding them prisoner makes him visibly uncomfortable. He feeds him more lies to appeal to his pity and threats to make him reconsider his plans to keep them captive. The boy becomes visibly flustered and leaves the room to think. | ||
| + | |||
| + | Harlan uses this, to retrieve the [[Harlan's Dagger|hidden dagger]] he always keeps in his shoe using his Arcane Trickster skills. He is able to free himself from the inexpertly tied bindings in not time, and he starts untying his companions. By the time their captor returns, almost all team members are free and fully armed. | ||
| + | |||
| + | Seeing weapons in their hands, the large suit of armor following the boy opens up, and envelops him inside, revealing that it is a magical armor golem. From inside his protective construct the boy ends up negotiating a truce. He reveals his name is [[Samuel Summers]] and the suit of armor is [[Mr Clatterby]]. He tells them how he came to be a vampire against his will, and how he inherited the mansion after [[Count Drakenhoff]] fell. | ||
| + | |||
| + | The heroes end up convincing him that their story is true by showing him the [[Key Stones]] given to them by [[Richard Oddenheim]], seeing how Senjack did not have any such stones. Samuel explains that the stones appear to be a key to unlocking one of the [[Magical Tapestry Portal]]s in this very room. He shows them how the tapestries work, by taking them to the [[Extraplanar Portal Hub]] and showing them the many tapestries on display there. He also explains how difficult they are to explore due to the fact many of them may be dead ends with no return portal, and others may lead to planes of existence where time flows differently, or which are inhabitable or even lethal to the living or the undead. | ||
| + | |||
| + | The [[Key Stones]] in their possession appear to be attuned to the other tapestry in the room: the one, that Samuel believes, leads to [[Lord Aiden's Study]] proper. In is 300 years of living in the mansion, he has been unable to activate that portal, and he is very curious as to what secrets are on the other side. He does not, however want to explore it by himself, for fear of getting stuck. Thus he concocts a plan, and asks the heroes to be his forward scouts. If they traverse the portal, and return to tell a story, he will allow them to keep the documents they came for, and release them, provided they make an oath not to reveal him to their employer. | ||
| + | |||
| + | The heroes agree to these terms and prepare for a dangerous journey into the unknown. To prepare them, Samuel gives them several Healing Potions. He also gives [[Kylee O'Ren]] a magical hammer named [[Whiplash]] and [[Butt Butterscotch]] a [[Healing Amulet]] with the symbol of Tempus. Finally he asks them to donate some blood before they leave, so that he can feed. All the members of the party, except [[Harlan Underford]] agree to this, and give blood to the vampire. Harlan politely declines, fearing the act could potentially give the vampire some power over him. | ||
== The Extraplanar Library == | == The Extraplanar Library == | ||
Revision as of 22:18, 31 May 2016
Contents
- 1 The Introduction
- 2 The Journey
- 3 A Day in Fairhaven
- 4 Meeting with Richard
- 5 The Ambush
- 6 A Rando Encounter
- 7 Party at the Seagull
- 8 Dinner with Richard
- 9 Search for Lord Aiden's Mansion
- 10 The Lifeless Gardens
- 11 The Mansion
- 12 The Study in Cubism
- 13 Bat Beat Down
- 14 Everyone Dies in The White Room
- 15 Captive Audience
- 16 The Extraplanar Library
- 17 Lower Thy Chub Sir
- 18 Come at me Bro
- 19 Gigantic Problem
- 20 Gateway into Piracy
- 21 Have You Seen Any Warlocks
- 22 CSI Fairhaven
- 23 Entourage
The Introduction
The story starts in a tavern in the Dockside district of Fynwell where Kylee O'Ren is recruiting mercenaries for her mission. The only people who answer her flyers and show up to the meeting are Butt Butterscotch, Bilbido Tastyflute, Harlan Underford and Zorry Feathermoon. Kylee explains that she has been contacted by old family friend Richard Oddenheim who needs assistance securing and transporting some Ancient Artifacts out of Fairhaven.
The protagonists, meet, greet and introduce themselves. Bilbido then performs a song titled "When You Send Me Carrier Pigeons". Patrons of the tavern agree it is an excellent cover of Yoland Swaginson hit single, "When You Send Me Ravens". Every one gets their advance pay (half of the agreed upon sum) and make travel plans.
The Journey

The company books a trip to Fairhaven on the Royal Seagull commanded by Captain Bethany Rogers. While en-route, the ship becomes enveloped in a magical mist that limit it's visibility and then fired upon by a hidden ship.
The projectiles which crash on the deck turn out to be barrels full of bones, which become animated skeleton warriors. While the crew is busy fighting with the undead threat, the enemy ship emerges from the mist and prepares for boarding. Bethany identifies the enemy ship as familiar merchant vessel The Kraken, however it's crew appears to have been replaced by the living dead. One notable addition to the ships silhouette is a massive trebuchet mounted on the back deck. It's hull also appears to be filled to the brim with human bones.
The boarding crew is composed mostly of skeleton warriors accompanied by a few Wights. The heroes are able to keep the deck clear by liberal use of the Thunderwave spell. Most of the Wights are dunked into the brine before they reach close combat range.
The party members without access to deck-clearing spells fight their way to the balista, and use it to damage the sails of The Kraken. With it's sails ripped to shreds, the undead ship falls behind and the Royal Seagull is able to get away.
The enemy ship appears to be commanded by a Squidface, a mysterious Mindflyer wearing pirate garb. During the encounter he briefly manages to mind control both Kylee O'Ren and Bethany Rogers. Kylee experiences a vivid hallucination during which she re-lives the horrific murder of her parents, and passes out.
Bethany on the other hand falls under the control of the Mindflyer and manages to heavily damage the ship's balista, before she is knocked unconscious by the heroes. The first mate Steven LaCase is grateful that the heroes managed to incapacitate her before she hurt anyone, and before the crew noticed anything.


A Day in Fairhaven
Upon arriving in Fairhaven, the party split up to attend personal business.
But Butterscotch visited the Fairhaven Temple of Tempest. Kylee O'Ren went shopping and ended up at the Jerk Blacksmith. Harlan Underford established contact with Dirty Dirk, local Thieves Guild member and gathered intel about the local crime underworld.
Dirty Dirk revealed information about the three prominent local gangs, and their leaders: Rando, Smiling Sullivan and Cutthroat Jim.
The party then re-convened at the Nice Blacksmith and haggled over equipment prices.
Meeting with Richard

The heroes left Fairhaven to meet with Richard Oddenheim at his archaeological dig site located in the forest few hours of travel away from the city. Instead of excavations however, they found an abandoned hut in a forest clearing.
Zorry is able to use her ability to speak to animals to confirm a human male was seen entering and leaving the hut in the last few days. Fearing an ambush, the heroes carefully examine the hut, set up a defensive perimeter and attempt to enter inside to search for hidden passages. Suddenly Richard Oddenheim appears out of thin air and demands to know what their business is in this area.
Upon seeing Kylee, he remembers that they were due to meet here, and invites the heroes to follow him inside Richard's Fancyplace, his private extra-dimensional mansion. He proceeds to explain the delicate nature of his mission. He shows the team a stockpile of crates, filled with strange artifacts, but he is reluctant to speak about their source or nature. He does mention that while they have immense historical and cultural value, their mere existence is are politically inconvenient for the current rulers of the land. If they were to fall into the wrong hands, it would create a lot of trouble for all the parties involved.
Because of this he has arranged for the artifacts to be smuggled from the country in order to preserve and study them. The teams mission is to transport the crates from the hut, to specified drop-sites in Fairhaven.
To ensure that the artifacts are not discovered, Richard magically seals the crates. Any attempt to open the crates, or break the seals will cause the contents to be destroyed in a flash of magical light.
The party is given a map of drop-sites in the city, and provided with a horse and carriage they can use to transport the crates. The carriage can take up to six crates at a time, so they will have to take at least a dozen trips to transport them all. Upon delivering the crates to the drop locations, they are told to contact Rando DeButt who will handle them from that point on. They are told to meet him at The Wedge tavern.
The tricky part of the mission appears to be getting the cargo through the city gates. Richard warns the team that the guards like to perform random searches and solicit bribes from merchants. He insist that the guards must not open any of the crates. He leaves the logistics of getting the cargo through the gate to the protagonists.
The team loads the cart with six crates and after a short rest departs for the city. They arrange to arrive at small hours of the morning when the guard presence at the gate is sparse, and everyone is tired and ready for a change of guard. Harlan Underford attempts to disguise the crates and make them look very unimportant.
The Ambush

While traveling back to Fairhaven the party is ambushed by highway bandits at the small bridge crossing. The Heroes find themselves surrounded. Kylee and Bilbido attempt to negotiate with, while Harland hides in the bushes to mount counter-ambush. He is able to pick off a few stray bandits with well timed sneak attacks.
The bandits appear to be led by a huge individual standing on the bridge. At the first glance he is about 8 feet tall and wears a loose hooded cloak. Upon closer inspection, it turns out it's actually two people: a Gnome standing on the shoulders of a tall and muscular human. The negotiation fail and the bandits launch an all out attack.
The gnome is very fast and agile. He is able to snatch Kylees gold purse and get away. The purse contain the remaining money that she had owed to the other members of the party, payable upon completion of the job. The large human appears to be the Gnome's bodyguard and protector. During the fight he angrily punches the team's orse in the face, knocking it out. Both leave the scene with the money, leaving the rest of the men behind.
During the brawl, some of the bandits manage to drop one of the crates which explodes destroying the contents.
Butters and Kylee are able to take on most of the attackers head on, dispatching several of them out right. Zorry uses the confusion to shape-shift into a horse form. The bandits do not expect a horse to be hostile, and she is able to take several of them by surprise. In the meantime Bilbido and Harland work from the shadows, relying on stealth and sneak attacks, though eventually both are taken out of action. Bilbido is knocked out by a Half Orc bandit, while Harland ends up caught in a snare trap set up by the attackers.
The bandits suffer heavy casualties and survivors fee the scene. One of them is captured and interrogated. He reveals he works for Rando DeButt. The party votes whether or not to spare his life. Harland insists that they let the bandit go. The rest of the party agrees it would be too dangerous. Butterscotch slits the bandit's throat with his dagger.
After looting the bandits, and throwing the bodies into the river, the party resumes their journey.
Upon arriving at the city gates, the heroes decide to split the party. Kylee and Bilbido are chosen to ride on the cart and pretend to be merchants. Kylee is chosen for her tradeswoman experience, and the fact that she can pass for a hired bodyguard. Bilbido is chosen for his and personal charm and the fact he can pass as a merchant and sweet talk his way through the gates.
The rest of the party follows behind, close enough intervene and try to rescue as many crates as possible in case of a scuffle.
The groggy guards at the gate are profoundly uninterested in the cargo, until Captain Horsepuncher shows up. He notices that the horse had a black eye, and that the cart has scuff-marks in places where it was hit by crossbow bolts. He tries to solicit a bribe, until the heroes mention Rando DeButt at which point he immediately backs off. As the team departs he gives them a few tips on how to punch a horse so that it won't show which is rather disturbing.
A Rando Encounter

The heroes are able to deliver the crates to the gagreed upon drop-sites in the city without any issues. Upon finishing, the head to The Wedge tavern to meet with Rando DeButt and agree upon the pick-up schedule.
Upon entering the tavern, they realize that Rando is actually the same Gnome who lead the highway bandits who attacked them. He is accompanied by his half-brother Crud DeButt (the huge, muscular human warrior) and several other surviving bandits. Rando offers nominal apology for the "misunderstanding" and gives back what is left of the money they stole. He and his men already spent most of the cash in the purse.
Both sides realize they need to work together in the future and so the meeting ends without a physical altercation. On the way out, the heroes order few cases of ale on Rando's tab, and take them back to the ship.
While on their way, they notice flyers and posters announcing a grand concert at the Bacon Theather featuring Yoland Swaginson as the main attraction.
Party at the Seagull
The heroes spend the night at the Royal Seagull and attend a big sailor party and drinking bender.
During the party, they play Dragon Dice with Bethany Rogers, Steven LaCase and Little D. During the game Harlan Underford cheats on a crucial dice roll and wins over 80 gold. He shares some of his illicit winnings with Bilbido Tastyflute and Butt Butterscotch who lost almost all their cash.
The heroes partake in binge drinking of strange grog made by sailors and pass out.
Dinner with Richard
In the morning Harlan Underford goes out to scout the city walls for possible alternate routes into the city, to avoid more close calls with the city guard. He does not find a reliable entrance they could use, but does hear rumors that Prince Regent is due to arrive in town and that security is being increased in the anticipation for his arrival.
At the same time Butt Butterscotch goes to visit the Fairhaven Shrine of Tempus and upon touching the stone on the altar has a vivid Prophetic Vision.
In the evening the heroes are invited to a dinner at Richard's Fancyplace to discuss the details of the operation in more detail. Kylee O'Ren is still recovering from the party, so she decides to stay on the ship. She does, however, write Richard a short letter, describing the altercation with Rando and his men.
Richard is disturbed by the letter and promises to take care of the matter, and recover the money Rando stole. He advises the heroes to hold off making any drops until the matter is settled.
In the meantime, he wants the heroes to do him another favor in order to move his research along. Richard is interested in locating ruins of a Lost Dwarf Fortress in the area. He believes that the Dwarves traded with local aristocrat Lord Aiden whose family owned land somewhere near by, long before Fairhaven was founded. He believes he found a possible location of Lord Aiden's Mansion and would like the heroes to investigate it's ruins for any possible clues about the fortress. He is especially interested in Lord Aiden's Trade Ledger or any other trade ledgers and documents that might have been preserved.
He provides the party with a set of magical scrolls he thinks might be useful in their mission as well as set of magical Key Stones that they may need to enter Lord Aiden's Study chamber. He also attempts to teach them some of the ancient alphabet that was used in Lord Aiden's times so that they can identify the correct documents if they find them.

Magical Scrolls

Key Stones


The mansion ruin is located few days of travel away from Fairhaven, so the heroes decide to spend the night at the Royal Seagull and depart the next morning. At night they receive a Tweet from Richard saying that he is in the city to deal with Rando.
The heroes decide to head to The Wedge in order to back Richard up, and make sure he doesn't get himself into trouble. When they arrive, they see the tavern is temporarily closed doe to a gaping hole in the wall. An eye-witness confirms that it was vandalized by an angry wizard. There was no casualties on either side.
Search for Lord Aiden's Mansion
The heroes follow Richard's map and arrive at the approximate location of the ruins without issue. They find no traces of human settlement so they retrace their steps tying to make sure they are in the correct place. Eventually they decide to split the party and search the forest for clues, and re-convene few hours later.
Bilbido Tastyflute proceeds to get completely lost. The part meets at the agreed upon location sans Bilbido and empty handed. They then decide to search for their friend. They manage to find him rather quickly, and in the process notice strange visual distortions out of the corner of their eye. Zorry detects presence of strong illusion magic that appears to be concealing something.
Upon closer inspection, the heroes realize that the forest appears to been divided into twenty feet cubes that seem to shift around and move and that walking into or past them. The edges of the cubes do not align properly, as if each cube was a projection of the forest, from a different perspective. The party quickly learns to manipulate the cubes, and realize it is a gigantic tile puzzle.

Lost in the Forest
Illusion Puzze
Illusion Puzzle Solved
Leafless Ents

Magical Lock


Upon solving the puzzle the heroes find themselves in a murky, lifeless version of the forest. The sky appears to be permanently overcast and the vegetation appears to have died without access to direct sunlight. Some of the leafless, sickly trees in the vicinity appear to come alive, and turn out the be Leafless Ents.
Zorry Feathermoon uses her druidic magic to communicate with the Ents. They appear to be very young, and all seem to have awakened in this murky version of the forest. Zorry confirms that they were likely created by high concentration of magic in the area.
The Ents do not appear to be hostile. Zorry and Butt Butterscotch both use healing magic to make them sprout leaves and flowers for the first time in their life.
The heroes then approach the wall surrounding the mansion. The wall appears to have magical protection that will thwart any attempt to climb it. There is a single gate, but it is locked by a Magical Puzzle Lock. Heroes use the notes they took at the dinner with Richard to quickly solve the puzzle and open the gate.
The Lifeless Gardens
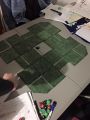
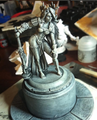
After opening the gate, the heroes enter the inner courtyard and dilapidated, Lifeless Garden. In the middle of the courtyard there is a large stone statue representing a woman armed with a heavy club. There are decomposing skeletal remains of several adventurers strewn across the garden. They appear to have been dead for a very long time.
While the garden looks old and abandoned, the mansion itself is in a very good shape and shows no sign of disrepair. No roof tiles are missing, no masonry is crumbled and all the windows still have glass in them.
Harlan Underford notices a mysterious figure observing the party from the second story window. The stranger appears to be clad in full plate armor, wearing a helmet with it's visor down to hide the face.
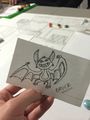
Zorry Feathermoon notices a small bat hanging around the statue. She attempts to communicate with the bat using her druidic powers. She learns that the bat is named Bruce and that he is the night. He is adamant that the party leaves the property right away, least his master become very cross with them. Zorry confirms that the creature is a Familiar. It identifies it's master as Count Drakenhoff who apparently currently resides in the mansion.

Entering the Gardens
Garden Gnome
Bruce

Garden Gnome Defeated


After it becomes clear the heroes are not about to leave, Bruce becomes irritated and flies off. Harlan considers shooting the bat as it flies away to preven him from alerting his master. Zorry stops him pointing out that the familiar's master is linked to the animal, and already knows of their presence. She suggests a diplomatic approach, hoping that perhaps the current resident of the mansion may be convinced to trade for the ledgers.
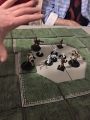
As the herpes approach the mansion, the statue comes to life and swipes it's club at Bilbido Tastyflute sending him flying across the gardens. A fight ensues, and the heroes are able defeat the animated statue. It crumbles into pieces. Zorry takes the two Red Gems that were it's eyes to have them identified later.
The door to the mansion has an ordinary, mundane lock, and Harlan is able to lock-pick it in no time. The heroes carefully enter the mansion.
The Mansion
Upon entering the mansion, the Protagonists find themselves in a expansive foyer. They admire several stuffed Owlbears, as well as a huge painting above the mantle. The painting depicts Count Drakenhoff along with family, and servants.
They start exploring the mansion starting with the ground floor. The the place seems to be unusually clean, and taken care of. There is almost no dust, and no cobwebs suggesting regular maintenance and habitation.
In one of the rooms heroes and find some Drakenhoff Aged Wine. The heroes proceed to open one of the bottles and have an impromptu wine tasting. Surprisingly no one gets poisoned. Butt Butterscotch takes few bottles for later.
Bilbido Tastyflute finds a Leather Bound Music Journal which appears to contain notes by some unknown composer.
While traversing a long hallway the heroes are spotted by Bruce who is inside the house now. He activates one of the mansions defense mechanisms by pulling a lever on the wall.
The Study in Cubism
When Bruce pulls on the lever, several small holes open in the wall behind the heroes, and a Gelatinous Cube oozes into the hallway. The team keeps their distance, and advances forward while taking shots at the slow moving creature behind them. Bruce sees the heroes advancing and disappears beyond the corner. Heroes try several doors in the hallway but they are all locked, and they do not want to stick around trying to lock-pick them while the cube is moving purposefully towards them.


When they reach the corner Bruce is there, and this time he brought friends in form of several bat swarms. There appears to be another gelatinous cube approaching from the opposite side of the hallway. Between the two cubes, and the bat swarms the heroes are funneled toward a stairway. They opt to head upstairs, fearing getting trapped in the cellar.
Upstairs there is another long hallway with several closed doors. The cubes follow the heroes upstairs, and continue advancing towards them. Eventually they reach the end of the hallway and Harlan Underford picks the lock. They find themselves in a small study that contains a desk, and several shelves of books and ledgers. They figure this room may contain Lord Aiden's Trade Ledger and decide to make their stand here.
While the heroes try to set up defense position to fight the cubes at range, they are ambushed by bats. During the frantic fight they use up both of their Fire Bolt scrolls. They are eventually able to vanquish both of the cubes, and chase most of the bats away.
They begin searching the study for the ledger, inspecting the desk and the book shelves. Harlan Underford notices finely woven tapestries hanging in the room and touches one of them. His hand passes through, revealing it to be Magical Tapestry Portal leading to Lord Aiden's Study.
Suddenly the heroes find themselves in a White Room facing Bruce and Count Drakenhoff.
Bat Beat Down

The heroes try to negotiate with Count Drakenhoff but he appears to be uninterested in anything but unconditional surrender. The protagonists refuse to lay down their arms and be captured and prepare to fight. Drakenhoff considers facing them, but ultimately leaves the job of subduing the invaders to his familiar Bruce.
The tiny bat transforms into his monstrous demon form. In this form he is incredibly strong and fast, and more than capable of taking on the protagonists who have been weakened by the fight against the gelatinous cubes and bat swarms. He manages to knock out Bilbido Tastyflute, but eventually is defeated.
He transforms back into his bat form and flies away. Count Drakenhoff returns to the room, to finish the job. At this point the heroes are very weak and completely depleted in terms of spells and ammunition. The heroes make a decision to use one of Richard's Scrolls to cast Oddenheim Domicile and scramble into the portal, dragging the unconscious party members along.
Inside of the pocket dimension they rest up, heal, and prepare for battle. Upon regaining consciousness, Bilbido Tastyflute sings a song to bolster the spirits of his comrades. After taking a long rest, the heroes emerge from the pocket dimension ready for a fight.
To their surprise they are no longer in the White Room but back on the ground floor of the mansion. They re-orient themselves and decide to go back upstairs and finish rummaging through the study, this time avoiding the tapestries.
On their way, they are once again spotted by Bruce. Almost immediately, they find themselves inexplicably transported to the White Room where Count Drakenhoff awaits them.
Everyone Dies in The White Room
This time Bruce stays out of the fight, humbled by the previous encounter. Count Drakenhoff takes the matter into his own hands. To even the odds, he summons three Fake Hoffs using his blood magic. Those phantom copies of himself appear to have a fraction of his power and magical ability.

Drakenhoff
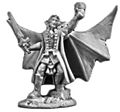
Fake Hoff


What ensues is a protracted and arduous battle between the heroes and four Hoffs. Upon being defeated, the Fake Hoffs explode into clouds of bats, which continue fighting, harassing the heroes. One by one, all of the protagonists fall. Last two men standing are Harlan Underford and Butt Butterscotch. As one of the Fake Hoffs cuts down Butterscotch, Harlan is able to get behind the real Drakenhoff and deal a final blow that causes him to fall prone.
As Drakenhoff falls, Harlan is attacked from behind by previously unseen enemy. And armored hand lifts him into the air and attempts to break his neck. Just before Harlan falls unconscious he sees Drakenhoff ordering the unseen assailant to stand down.
Captive Audience
The heroes wake up back in the room with the magical tapestries. They are fully healed, and any injuries they have suffered are gone. They are all tied to chairs. Harlan Underford notes that whoever restrained them did not have much experience in tying people up, and tried to make up for it by using excessive amount of rope. When he looks around the room he sees a scrawny, teenage boy attending to Zorry Feathermoon. He appears to be tenderly adjusting her bindings so that they not any more uncomfortable that they need to be.
When the boy realizes the heroes are starting to wake up, he immediately shifts into the Count Drakenhoff form. When Harlan calls him out on it, the boy becomes flustered and returns to his youthful appearance realizing there is no point in keeping up the charade. The heroes aggressively demand to be released, making the boy increasingly more nervous. This prompts a hulking giant in full plate armor to enter the room, but the boy sends him away.
The boy demands to know how they have found his secret mansion. Harlan reveals that they have been sent by an affluent scholar and archeologist researching the history of the the Aiden Family. He decides to conceal the fact their employer is also a powerful wizard. The boy is skeptical of that story and keeps questioning them about man named Senjack who has recently vanished. This man was the only person in Fairhaven who knew how to find the mansion and bypass the protective magic that conceals it. The boy suspects that the heroes are vampire hunters who have captured, and possibly killed Senjack for this information, and arrived here in order to kill him.
Even if they are hired mercenaries, as they claim, they cannot be released now that hey know his secret. They could easily sell the information to actual hunters, or worse yet, publicly expose him making him a target for any and all adventurers.
Harlan realizes that the boy might actually be a good person despite his vampirism, and that the idea of holding them prisoner makes him visibly uncomfortable. He feeds him more lies to appeal to his pity and threats to make him reconsider his plans to keep them captive. The boy becomes visibly flustered and leaves the room to think.
Harlan uses this, to retrieve the hidden dagger he always keeps in his shoe using his Arcane Trickster skills. He is able to free himself from the inexpertly tied bindings in not time, and he starts untying his companions. By the time their captor returns, almost all team members are free and fully armed.
Seeing weapons in their hands, the large suit of armor following the boy opens up, and envelops him inside, revealing that it is a magical armor golem. From inside his protective construct the boy ends up negotiating a truce. He reveals his name is Samuel Summers and the suit of armor is Mr Clatterby. He tells them how he came to be a vampire against his will, and how he inherited the mansion after Count Drakenhoff fell.
The heroes end up convincing him that their story is true by showing him the Key Stones given to them by Richard Oddenheim, seeing how Senjack did not have any such stones. Samuel explains that the stones appear to be a key to unlocking one of the Magical Tapestry Portals in this very room. He shows them how the tapestries work, by taking them to the Extraplanar Portal Hub and showing them the many tapestries on display there. He also explains how difficult they are to explore due to the fact many of them may be dead ends with no return portal, and others may lead to planes of existence where time flows differently, or which are inhabitable or even lethal to the living or the undead.
The Key Stones in their possession appear to be attuned to the other tapestry in the room: the one, that Samuel believes, leads to Lord Aiden's Study proper. In is 300 years of living in the mansion, he has been unable to activate that portal, and he is very curious as to what secrets are on the other side. He does not, however want to explore it by himself, for fear of getting stuck. Thus he concocts a plan, and asks the heroes to be his forward scouts. If they traverse the portal, and return to tell a story, he will allow them to keep the documents they came for, and release them, provided they make an oath not to reveal him to their employer.
The heroes agree to these terms and prepare for a dangerous journey into the unknown. To prepare them, Samuel gives them several Healing Potions. He also gives Kylee O'Ren a magical hammer named Whiplash and Butt Butterscotch a Healing Amulet with the symbol of Tempus. Finally he asks them to donate some blood before they leave, so that he can feed. All the members of the party, except Harlan Underford agree to this, and give blood to the vampire. Harlan politely declines, fearing the act could potentially give the vampire some power over him.